History of Photography
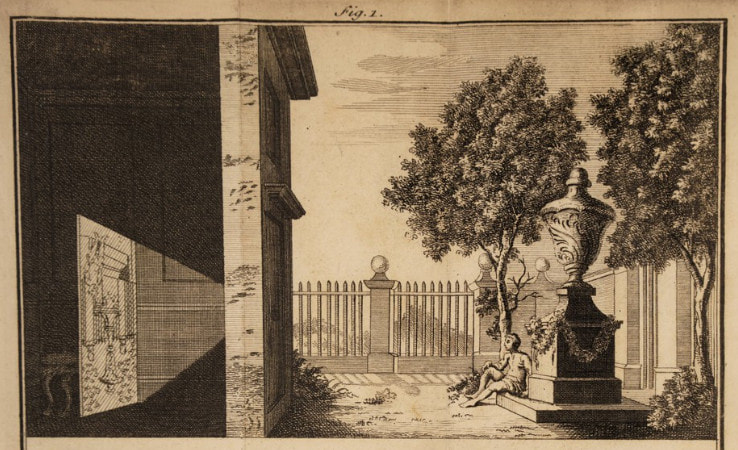
Camera Obscura
|
The camera obscure is the first type of photographic camera. The word Camera Obscura means 'Dark chamber" in Latin. It is basically a dark room with a small hole in one of the walls. The hole makes an inverted image of the outside ad is shown on the wall opposite to the hole.
|
My Camera Obscura


The way I made my own Camera obscure was by using tape, black paper (so it's a small dark room), tracing paper and a mini magnascope. I didn't find anything difficult. The focal length is the distance between your lens and the back of the camera (tracing paper). The way I altered the focal length was by using an extra piece of black paper and cutting down (while the lens was on it) until the image was Clear. After I could see the image I drew what I could see, it was an upside-down computer. I had to cut down the lens till the image was clear after it was clear I drew what I saw.
WWW: I think while I was constructing the camera was the best part I did.
EBI: It would be better if I drew more of the scenery.
EBI: It would be better if I drew more of the scenery.
DSLR Intro
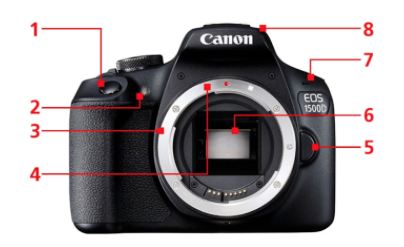
1. Shutter Release
2. Self-timer Lamp
3. Lens Mount
4. Lens Mount Index
5. Lens Release
6. Mirror
7. Microscope
8. Build-in Flash
2. Self-timer Lamp
3. Lens Mount
4. Lens Mount Index
5. Lens Release
6. Mirror
7. Microscope
8. Build-in Flash
|
B1. Eyecup
2. Veiwfinder Eyepeice 3. LCD Monitor 4. Menu Button 5. Playback Button 6. Wi-fi Lamp 7. Access Lamp 8. SET Button/Multi-controller 9. ISO Speed Setting Button 10. Quick Control Button 11. Display Button 12. Erase Button 13. Focus Point Selection Button 14. Live View Shooting/Movie Shooting Switch 15. Dioptric Adjustment Knob 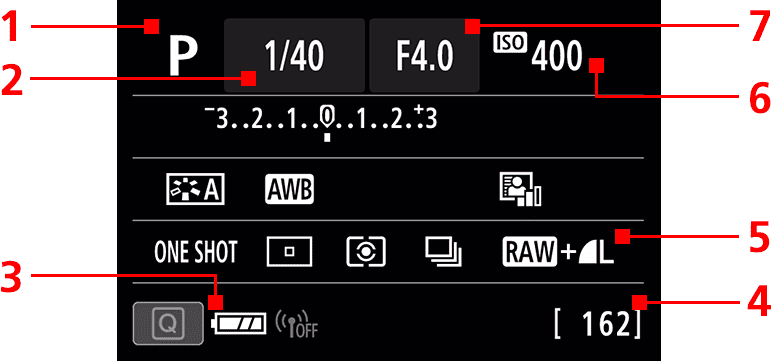
1. Focus Mode Switch
2. Speaker 3. Strap Mount 4. Hot Shoe 5. Power Switch 6. Mode Dial 7. Flash Button 8. Main Dial 9. Zoom Ring 10. Focus Ring |

1. Shooting Mode 2. Shutter Speed 3. Battery Level 4. Shots remaining 5. Image Recording Format/Quality 6. ISO Speed 7. Aperture Value 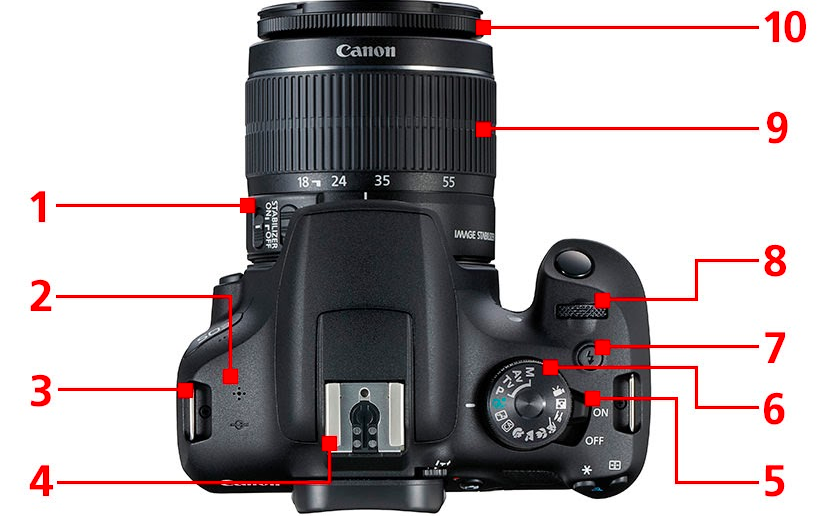
|
My First Photographs
For my first task of my photography GCSE I was set to take images regarding the theme Natural vs Manmade. My settings on the camera was 400 for the ISO, TV/ Shutter Speed priority for the program mode and the Shutter Speed was 1/60th of a second.
Best Edits


WWW: Because it was my first time taking pictures with a real camera it was very fun, I feel like a took appropriate images with it e.g the flower with the bee on it. The only difficult things were the exposure and the ISO.
EBI: It would be better if I took more photos.
EBI: It would be better if I took more photos.
Shutter Speed
Shutter speed is the time of how long the camera takes the photo and how long it is exposed to light. Shutter speed controls on how long it is exposed to light like I said before and how it is responsible for the appearance of motion in the photo. Shutter speed is measured in fractions of seconds so for example 1/10 means a tenth of a second and 1/200 means a two-hunderedth of a second. The program dial setting was on the Tv mode.
My images
|
|
|
|
ISO: 800
Shutter speed:1/10 Aperture: f/14.0 |
ISO: 800
Shutter speed:1/60 Aperture: f/5.6 |
ISO: 800
Shutter speed: 1/200 Aperture: f/4.0 |
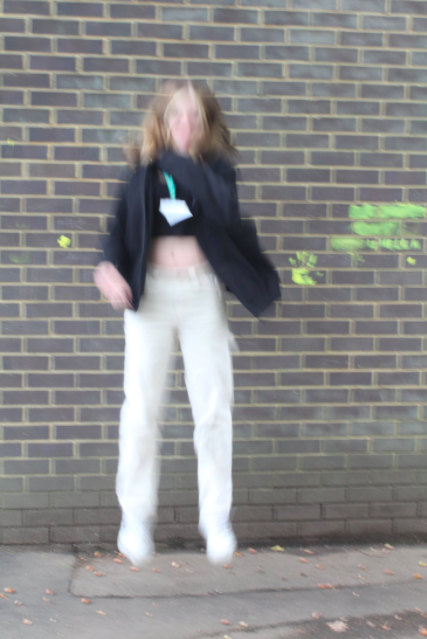
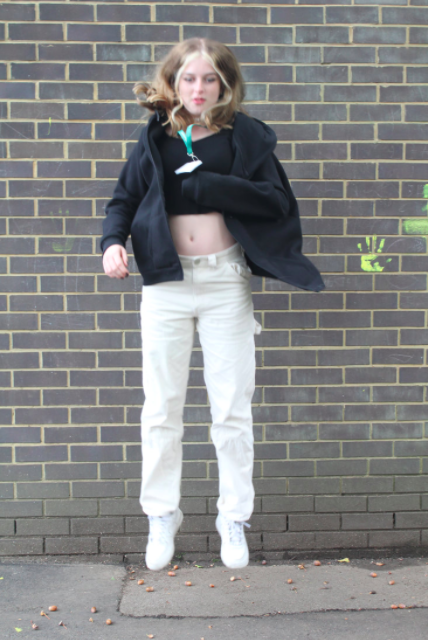
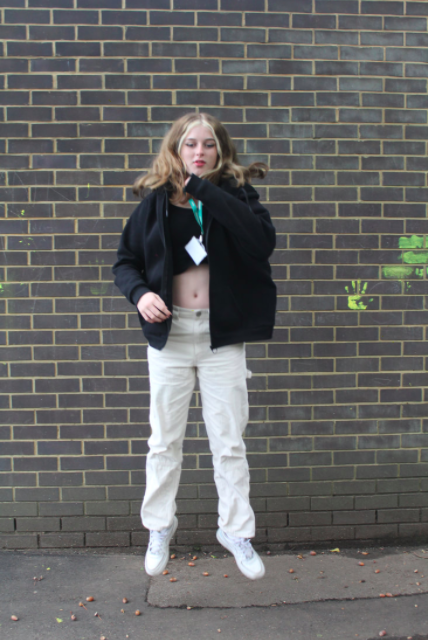
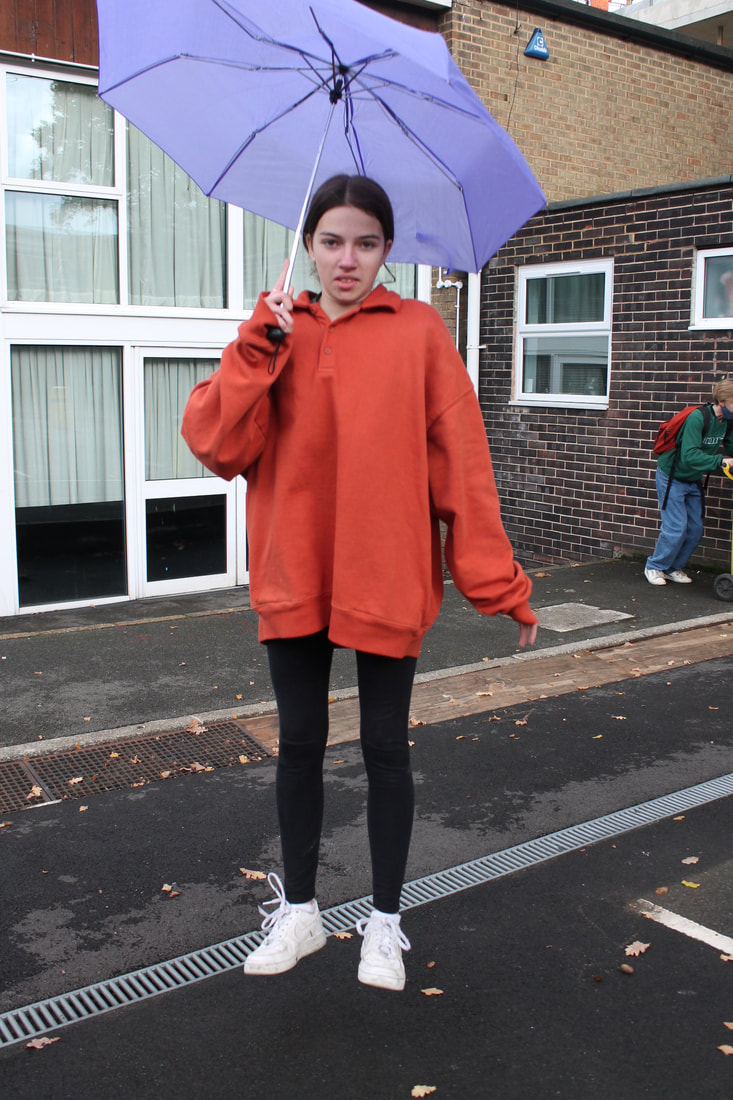
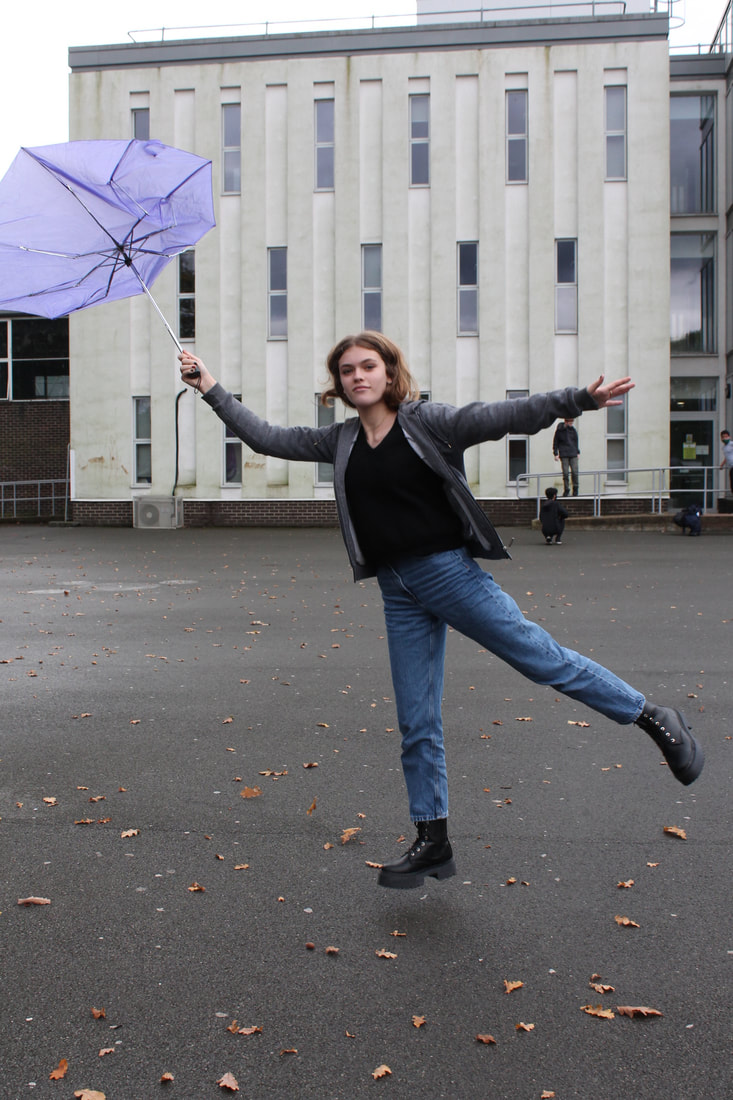
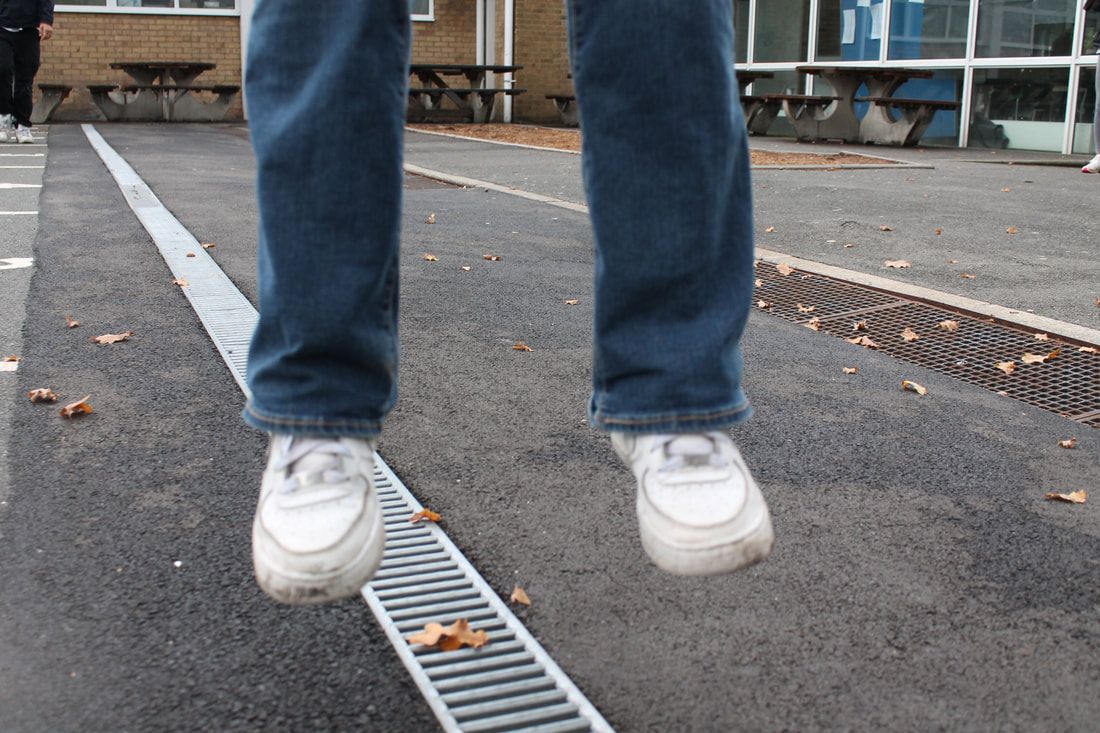
Levitation
In this task I was trying to take photos of a person in the air looking like its normal (but they actually jumped). This also links to the theme of Levitation by in the captured photo the person is above the ground which shows they are levitating. I used props (umbrellas) to capture it better.
Yowa Yowa
We tried to follow Yowa Yowa's work.
Here is some of her pieces.
Here is some of her pieces.
My response
When I tried I only got to take some pictures because of the big group I was in.But I think after a while of practicing I got some good shots. Here are some good tips if you want to take a good levitation photo, go on Manual focus; Have the Camera on 200 or 400 of a second for shutter speed; make it continues shooting; should be on Tv mode and the ISO should also be at 400. Furthermore for the model they should keep clothes tucked in and their hair tied up. Best if you take the photo of the model when they start to jump instead of when the go back down.
|
|
|
|
Best Edits

These two photos are my edited work (photoshop). I have used ISO 400, shutter speed on 1/40 because of the bright light on that day. Making everything look natural as if there was zero gravity. I think i need to improve on focusing the lens and also having an non human background when needed.
Levitation Homework
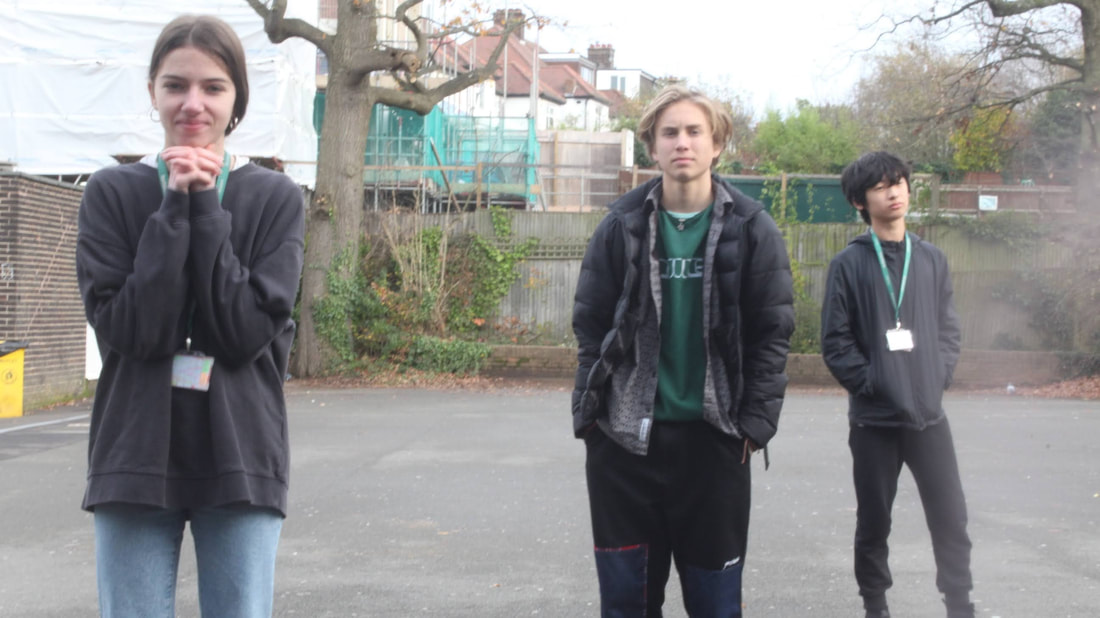
I was required to do the same task in school but at home. So I asked my brother to do the Levitation task. I made him do various types of jumps and poses.
Francesca Woodman
Francesca Woodman was born on the 3rd of April in Denver, Colorado. Woodman took her first self-portrait at age thirteen and continued photographing herself until she died. In 1975 Francesca went to The Rhode School of Design. She studied in Rome for 2 years (1977-78) she got inspired by books on surrealism which soon became a key point in her work. In 1979 she moved to New York with the dream of starting a career in fashion photography. During 1979 to 1981 she made many photographs of herself and other women. But sadly from deep depression she committed suicide.

Providence, Rhode Island (1975-78)
In the photograph Francesca has captured herself in a room. She has made the photo black and white to show the lightings. In the room there is a dark grey skirting on the bottom of the lighter grey wall. At the right you can see a window which is shining its light on the wall but not on her. Woodman is wearing a black dress with knee length heels. Her feet, right in front of left, and part of her left leg with some of her back is visible but nothing else. She bending forward, as if she is reaching out to something or searching for something on the floor. Her figure is blurred and appears almost ghost-like. Her body in motion suggests urgency and desperation. In most of her photos she captures herself, she was asked why and she said "it's a matter of convenience, I'm always available".
In the photograph Francesca has captured herself in a room. She has made the photo black and white to show the lightings. In the room there is a dark grey skirting on the bottom of the lighter grey wall. At the right you can see a window which is shining its light on the wall but not on her. Woodman is wearing a black dress with knee length heels. Her feet, right in front of left, and part of her left leg with some of her back is visible but nothing else. She bending forward, as if she is reaching out to something or searching for something on the floor. Her figure is blurred and appears almost ghost-like. Her body in motion suggests urgency and desperation. In most of her photos she captures herself, she was asked why and she said "it's a matter of convenience, I'm always available".
|
What do you think Woodman’s intentions are?
Francesca Woodman intended to create dreamlike environments with interesting and unusual objects. She did this by using ordinary objects and materials such as shells, eels, pegs and mirrors to make unfamiliar contexts which evoked uncanny feelings. She wanted us to think about how we can transform body parts into distorted and surreal version of themselves. |
What wider context was Woodman addressing?
Woodman used surrealism in this piece of work. This is shown by when she said that while she was living in Rome, she regularly visited a bookshop that specialised on surrealism. So she was inspired to put it in her work. She wanted to explore the dreamlike environment that captured the surrealism concept, and she succeeded. |
How does Woodman’s style of photography and process support her intentions?
Woodman used long shutter speed and double exposure to create this work. This helped her to create the effect to capture the different stages of movement in ways that could trace the pattern of time. This helps to support her intention of her blurred work anddreamlike enviroments and unusual objects. |
Francesca Woodman Analysis
In this assignment I needed to follow Francesca Woodman's art work. Below and above you can see pieces of her work. Her type of work is too have a model or herself to shake or move and use a slow shutter speed and long exposure to create an ominous and mysterious type of picture. Her work is always black and white in a dingy scenery. Her work links to the theme of movement by the model shaking to create a blur effect.

Francesca
Woodman 1976 |

Francesca
Woodman 1975-78 |
My feedback
When I started taking the photos I needed to change the settings quite a bit. I changed the shutter speed from 1/30 to 1/8 to 0.4 to get the best outcome. I also changed the ISO form 800 to 100 because the lighting on what day was bright. As I went on with the task I improved with the angle of the camera and positions with the model.
My best edits

Shutter speed: 0.4
ISO: 100 Aperture: f/22.0 |

Shutter speed: 0.4
ISO: 100 Aperture: f/18.0 |
WWW: The movement from the model and the editing.
EBI: To use a tripod to make the background clear
EBI: To use a tripod to make the background clear
Aperture
Aperture is a camera setting for correcting the correct exposure. It is measured in f stops. 'F' stands for focal length of the lens. Aperture allows you to increase or decrease the depth or field. It shows how much is in front and beyond your subject.
Depth of field is the distance between the closest and farthest objects in a photo that appears acceptably sharp. Your camera can only focus sharply at one point.
Depth of field is the distance between the closest and farthest objects in a photo that appears acceptably sharp. Your camera can only focus sharply at one point.
My Response

Shutter speed: 1/320
ISO: 400
Aperture: f/ 4.5
ISO: 400
Aperture: f/ 4.5

Shutter speed: 1/80
ISO: 400
Aperture: f/ 9.0
ISO: 400
Aperture: f/ 9.0

Shutter speed: 1/6
ISO: 400
Aperture: f/ 29.0
ISO: 400
Aperture: f/ 29.0

Shutter speed: 1/400
ISO: 400
Aperture: f/ 5.0
ISO: 400
Aperture: f/ 5.0

Shutter speed: 1/60
ISO: 400
Aperture: f/ 14.0
ISO: 400
Aperture: f/ 14.0
Shutter speed: 1/10
ISO: 400
Aperture: f/ 32.0
ISO: 400
Aperture: f/ 32.0
WWW: Understanding the three different types of aperture modes.
EBI: I could take the photos better so you can really see the DoF difference.
I think I have shown the difference of DoF to an extent but still need to work on it. I think my composition was successful.
EBI: I could take the photos better so you can really see the DoF difference.
I think I have shown the difference of DoF to an extent but still need to work on it. I think my composition was successful.
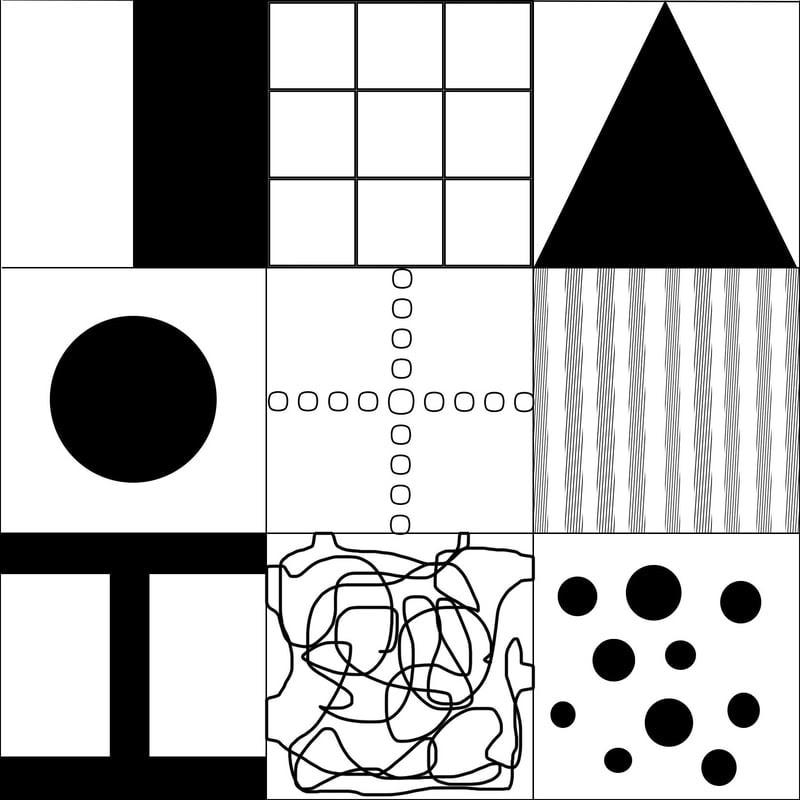
Composition
In this task I needed to find examples of the nine contrasting compositions (on a paper) that we where given out in class. I looked around school to find different types of compositions. I also tried to use aperture in some of the photos. Most of my photos are of walls, floors or objects.
One of my favourite image examples is used with aperture, I captured a wooden bench and switched up my depth of field so the grass behind it would become totally blurred out.
One of my favourite image examples is used with aperture, I captured a wooden bench and switched up my depth of field so the grass behind it would become totally blurred out.
Composition exercise
My best nine images
|

|
In my final 9 edited photos I needed to change my depth of field to capture the perfect photos. The ISO I used was 400.
WWW: Finding the right objects and places for the composition.
Also using apeture better than my first time.
EBI: I would use photoshop better.
GiF's
For one of my last tasks i had to make a gif. A gif is a short video of many still photos played one after another in a loop. I captured my model waving. In each photo her hand was still and then moved for the next photo.

WWW: The whole gif, taking it and making it.
EBI: If i used a tripod, so the background og the GiF wouldn't move at all.
EBI: If i used a tripod, so the background og the GiF wouldn't move at all.
